I know you probably don’t give your kitchen appliances much thought, but trust me, keeping them clean is super important. If you neglect to clean them regularly, it can lead to some serious consequences. In this ultimate guide, I’ll walk you through why keeping your kitchen appliances clean is crucial, what might happen if you don’t, and how often you should give them a good scrub. Plus, I’ll share some tips on cleaning specific appliances and how to maintain their cleanliness. Let’s dive in and make sure your kitchen is a sparkling, healthy space for all your cooking adventures!
What Are The Consequences Of Not Cleaning Kitchen Appliances?
I always keep my kitchen appliances clean because neglecting them can lead to many problems. I’m talking about harmful bacteria, funky smells, and even the chance of them breaking down and not working correctly. Not cleaning my appliances isn’t just gross, it’s also a health hazard. Bacterial contamination is no joke, and a dirty kitchen is not a pleasant place to be.
Dirt and grime build up and can leave some seriously unpleasant odours. Plus, if I don’t regularly clean my appliances, they won’t work or last as long. Maintenance is critical to keeping my appliances in top shape and avoiding costly repairs or replacements. Setting up a regular cleaning schedule is a simple way to protect my health and ensure my kitchen gadgets last a long while.
How often should you clean your kitchen appliances?
I use a regular cleaning schedule for my kitchen appliances to keep them sparkling clean and in tip-top condition. It’s all about finding the right balance between usage frequency and appliance type.
For those hardworking appliances like the oven and hob that get a lot of use, I aim for a deep clean once a month to ward off any stubborn grease buildup. As for the fridge, I give it a good scrub every fortnight to avoid any food contamination or unpleasant odours. Dishwashers and microwaves also receive a thorough clean every couple of weeks.
Now, I clean appliances that aren’t used as frequently, like the toaster oven or food mixer, on a more relaxed schedule every few months. By adjusting how often I clean each appliance based on usage, I can maintain my kitchen as a clean and hygienic environment.
What Are The Factors That Affect Cleaning Frequency?
I consider a few things when keeping my kitchen appliances clean. Efficiency is critical here—if I stay on top of regular cleaning tasks like wiping down surfaces daily and tackling spills immediately, I can prevent any grime from building up.
I also follow a maintenance checklist for each appliance. This way, I don’t overlook any critical cleaning tasks. I take into account each appliance’s specific needs. For example, stainless steel appliances might need different cleaning methods than glass or ceramic ones.
Understanding these differences helps me tailor my cleaning routine to keep my kitchen appliances in top shape for longer.
How To Clean Specific Kitchen Appliances?
Regarding cleaning my kitchen appliances, I like to tackle it with a strategic game plan to make sure everything gets a good scrub down and sanitisation. I follow specific instructions for each appliance type to ensure they get the maintenance they deserve.
First, I always unplug the appliance to avoid electric shocks. Then, I remove any removable parts like trays or shelves and let them soak in warm, soapy water. Then, I give the outside a good wipe with a gentle, eco-friendly cleaner, paying particular attention to those nooks and crannies where dirt loves to hide. For those stubborn stains, I whip up a mixture of bicarbonate of soda and vinegar for some extra cleaning power.
I always remember to check the manufacturer’s instructions for the best cleaning methods to keep my appliances running smoothly. I always use non-toxic cleaning products to keep my kitchen safe and healthy.
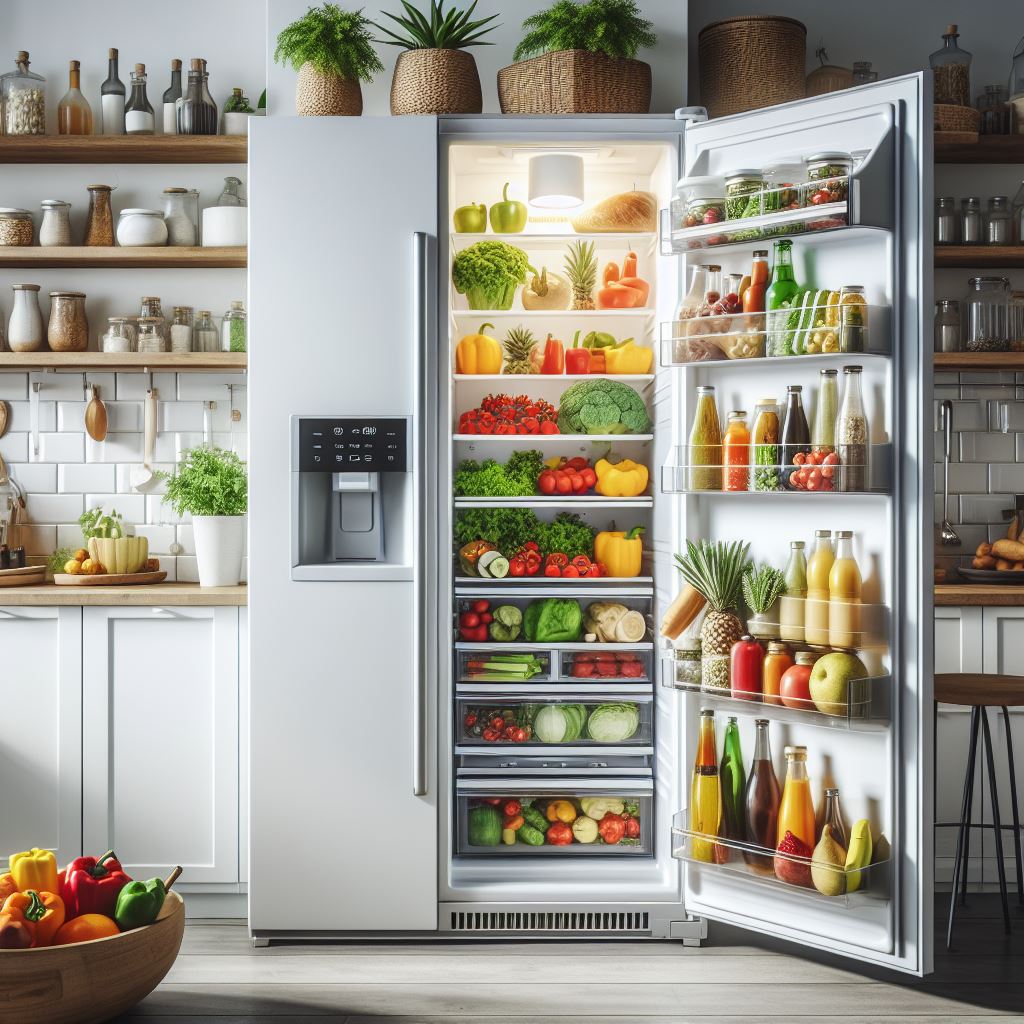
Refrigerator
When I clean out my fridge, I scrub away any stains, banish any pongy smells, and leave it all shiny and new. Maintaining my fridge is critical to keeping my food fresh and avoiding nasty bacteria.
Dealing with those tough stains in the fridge? I whisk up a mixture of bicarbonate soda and water to create a handy paste. I spread it over the stained areas, let it sit, and gently scrub it.
And those lingering odours? I place a bowl of activated charcoal or bicarbonate of soda inside to absorb and neutralise smells.
To get the inside of my fridge sparkling clean, I wipe down all the shelves and drawers with a mix of white vinegar and water. This not only leaves everything squeaky clean, but it also gets rid of any chemical residue.
Oven/Stove
I know cleaning my oven, and hob is all about tackling that tough grease buildup to keep things fresh and safe for cooking. Regular cleaning helps them last longer and keeps them working efficiently.
I’ve seen how grease and food gunk can accumulate in those hard-to-reach spots over time, turning into potential fire hazards and messing with the flavour of my dishes. To get rid of that grease, I always remove the oven racks and let them soak in hot, soapy water. Then, I whip up a paste with bicarbonate of soda and water to scrub the inside surfaces clean. And for a little deodorising action, I leave a bowl of white vinegar in the oven overnight to zap any funky smells.
I’m all about using eco-friendly products like vinegar, lemon juice, and baking soda instead of harsh chemicals. They do a great job of giving my oven and hob a safe and thorough cleaning without any nasty side effects.
Dishwasher
Keeping the dishwasher squeaky clean isn’t just for show – keeping those nasty bacteria at bay and ensuring it’s working like a well-oiled machine is vital. Taking good care of the dishwasher means saying goodbye to dirty dishes and hello to a kitchen that’s nothing short of hygienic.
I’ve got a routine for cleaning and sanitising all the bits and bobs in the dishwasher—the filter, spray arms, and even the door seal. Trust me, it’s a must if you want your dishwasher to last. Skip out on these important tasks, and you might find yourself dealing with stinky smells, mould creeping in, and even some damage to your appliance down the line.
I swear by using safe and effective cleaning solutions like vinegar or bicarbonate of soda. They work like a charm to eliminate funky odours or residue without harsh chemicals that could mess up the dishwasher or leave a weird film on your dishes. It’s all about keeping things running smoothly and having dishes sparkling clean every time.
Microwave
When cleaning my microwave, I wipe it inside and out to keep it safe and running smoothly. Regular cleaning is vital in preventing food gunk from building up and keeping it in top shape.
To tackle the task effectively, I start by popping a microwave-safe bowl filled with water and either some lemon slices or a splash of vinegar. After heating it on high for a few minutes, the steam helps to loosen up any dried-on food bits.
Once that’s done, I carefully remove the bowl and use a damp microfibre cloth to wipe down the interior. I pay extra attention to the nooks and crannies where dirt likes to hide. For those tough stains, I whip up a paste with bicarbonate of soda and water and gently scrub away without risking any damage to the surface.
Coffee Maker
I believe in keeping my coffee maker squeaky clean for top-notch performance and the best-tasting brew. Regularly using suitable cleaning solutions and giving my coffee maker a good polish guarantees a fresh and flavourful coffee experience.
Taking care of my coffee maker is vital to making it last longer. Descaling, which is all about removing mineral buildup inside the machine, should be on my to-do list every 1-3 months, depending on how much I use it. All it takes is mixing water and white vinegar in equal parts, then running a brewing cycle without any coffee grounds. I need to mix water and baking soda to eliminate any lingering odours to deodorise the coffee maker. These simple yet effective routines are my secret to keeping my coffee maker in top-notch condition for years.
Toaster/Toaster Oven
Regarding keeping my toasters and toaster ovens spick and span, I swear by using vinegar for some degreasing severe action. And let me tell you, ensuring everything is bone-dry after cleaning is critical to avoiding any moisture buildup that could cause trouble.
Adding vinegar to my cleaning routine is a game-changer for tackling those stubborn grease and grime spots that love to stick around. The acidity of vinegar breaks down those harsh residues, leaving my toaster and toaster oven shining like new.
Once I’ve finished cleaning, I always take the time to ensure everything is dried out correctly. I don’t want to create a cosy tiny home for mould or bacteria, so I thoroughly dry my appliances inside and out. It helps them stay functional and prevents any damage from moisture creeping in.
Consistent cleaning keeps my appliances looking top-notch, helps them perform better, and last longer. It’s all about that TLC for my toasters and toaster ovens!
Blender/Food Processor
I like to keep my blenders and food processors looking spick and span, so I rely on bicarbonate of soda to tackle tough stains and keep them shiny. Regularly giving these appliances some TLC ensures they run smoothly and my food stays hygienic.
When it’s time to give my blender or food processor a good scrub, I take them apart and let the parts soak in warm, soapy water. I use a soft brush or cloth to remove any stubborn food bits. For those pesky stains, I whip up a paste of bicarbonate of soda and water and gently scrub away. After cleaning, I rinse everything well and let it dry completely before putting it back together.
I blend water with lemon juice or vinegar to banish any lingering odours. I then run a mixture of water and white vinegar through the appliance to sanitise it for an extra clean feel. By keeping these appliances clean and well-maintained, I help them last longer and ensure my food prep is safe and sound.
Slow Cooker
I like to keep my crockpot cleaning simple. I use lemon to naturally deodorise it, wash it well, and ensure it’s sanitised to meet food safety standards. Taking care of my crockpot keeps it smelling fresh and helps it last longer and work better.
To tackle those stubborn stains, I whip up a paste with bicarbonate of soda and water, slather it on the needy spots, and let it hang out for a few hours before giving it a good scrub. It’s vital to wait until the crockpot is completely cooled before diving into cleaning mode.
When washing the removable parts, like the pot and lid, I opt for warm, soapy water and a gentle sponge to avoid scratching anything. For a final touch, I sanitise the exterior with a mix of vinegar and water or use a sanitising solution recommended by the manufacturer. Thanks to these simple cleaning tips, my crockpot stays in tip-top condition!
Stand Mixer
I always care for my stand mixers by gently cleaning and maintaining them with a trusty microfibre cloth. It’s the key to keeping them running smoothly and performing at their best for a long time.
This simple cleaning routine isn’t just about looks—it’s about functionality, too. Keeping my mixer clean operates like a well-oiled machine whenever I whip up something delicious. Plus, a clean mixer means no more pesky ingredients sticking to the sides or causing buildup that could mess with its performance. Regular TLC with a microfibre cloth is the secret to minimising wear and tear on all the parts, helping my stand mixer live its best life for as long as possible.
What Are Some Tips For Maintaining Clean Kitchen Appliances?
Keeping my kitchen appliances clean is a doddle when I use efficient cleaning techniques, opt for natural cleaning solutions, tackle tough stains with spot treatments, and follow the manufacturer’s instructions in the appliance manual.
By incorporating these simple yet effective strategies into my routine for maintaining kitchen appliances, I keep them in top-notch condition and boost their lifespan. Don’t forget to wipe surfaces regularly with a mixture of vinegar and water for a natural and eco-friendly clean. When dealing with stubborn stains, I swear by a paste made of baking soda and water or some lemon juice to target and break down the grime. And, of course, I always refer to the appliance manual for specific care instructions tailored to each appliance. It’s also essential not to overlook preventive maintenance tasks like checking seals, filters, and vents for potential blockages.
Clean Up Spills Immediately
I always make sure to clean up spills right away, especially in the kitchen. Not only does it keep things smelling fresh, but it also stops residue from building up and keeps everything nice and hygienic.
When spills happen, I jump into action to prevent them from seeping into hard-to-reach spots and getting all crusty. Wearing gloves protects my hands and stops any bacteria from spreading around. I can avoid any funky smells and keep harmful bacteria at bay by ensuring I get rid of all the residue.
To ensure my kitchen stays clean and healthy, I must deal with spills as soon as possible, use the correct cleaning methods, and stick to a regular cleaning schedule.
Use Natural Cleaning Solutions
I love using natural cleaning solutions for my kitchen appliances. It’s not just about getting rid of odours – it’s also about keeping my cleaning routine organised and making sure everything works perfectly.
These eco-friendly options aren’t just effective and safe for me and the environment. Take a simple mix of white vinegar and water, for example. It’s like a miracle worker when it comes to wiping away grease and grime from my oven. Then there’s baking soda, a real superhero of an ingredient. It can fight off odours and scrub those stubborn stains on my refrigerator shelves. I swear by these DIY recipes and natural solutions in my cleaning routine. They help me keep my kitchen appliances in top-notch shape while cutting back on harsh chemicals.
Regularly Check And Replace Filters
I always check and replace the filters in my kitchen appliances regularly. It’s crucial to keeping my home clean, preventing breakdowns, and keeping my appliances running efficiently.
Filters are essential for smoothly operating kitchen gadgets like cooker hoods, air purifiers, and coffee makers. By staying on top of filter maintenance, I can make my appliances last longer and work at their best. I follow the manufacturer’s instructions to know how often I should clean or replace the filters. When cleaning them, I use a mild detergent and warm water to gently scrub away all the dust and grime that’s built up.
Deep Clean Once A Month
I like to schedule a deep cleaning session for my kitchen appliances once a month. It involves serious disinfection, tackling essential household tasks, and aiming for spotless results to keep my kitchen clean and hygienic. By making these regular deep cleaning sessions a part of my home maintenance routine, I’m not just looking after my appliances’ longevity but also creating a healthier living space.
To help me out, here’s a handy checklist for deep cleaning my kitchen appliances. First, unplug and empty the appliances, then give them a good scrub using a mix of warm water and mild detergent. For those tricky stains, a paste with baking soda does the trick. I always pay attention to easily forgotten areas like seals and hinges for a thorough cleaning.
If you feel like you’ve stacked too many single-purpose appliances, check our list of ideas on how to deal with the kitchen clutter!